
 We briefly introduced the FFT part of the Accelerated Framework in Part I of this tutorial.
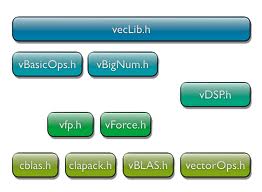
We are now going to focus on the vDSP library and create the C++ class responsible for doing the spectral analysis work of our input samples. We want to keep it simple, with a few public methods, however we would like to perform FFT analysis on different frame sizes. So, one of our challenges is to design a circular buffer as member variable, which is a common pattern in audio programming.
Xcode Setup
In case you don’t have your development environment initialized with a clean template for building audio units, I suggest you download the source code of this tutorial, then open the C++ class called SimpleSpectrumProcessor.h located in the “Sources/SpectrumAU” folder.
First of all, if you look at the “PublicUtility” folder of the CoreAudio SDK, you may notice a quite similar class called “CASpectralProcessor”. Actually, you can consider our class as a reduced version of “CASpectralProcessor”, more readable to my opinion, with a different buffers organization that allows the use of various FFT sizes upon time (between 1024 and 16384 frames). As common design, we will reuse the classes CAAutoFree and CAAutoArrayDelete so as to implement each data buffer. The former is basically an alternative to the std::auto smart pointer with the same restrictions on pointer ownership, but since it’s using malloc to allocate memory, it will guarantee that the allocated memory is aligned on a 16-bits boundary (what vecLib needs). The latter is a similar version using “new” for memory allocation.
So you need to include the header “PublicUtility/CAAutoDisposer.h”, either in our class header, either in the project’s precompiled headers section. You also need <Accelerate/Accelerate.h> for the vDSP library and the “vecLib.framework” binary added to your build settings.
1 2 3 4 5 6 7 8 9 10 11 12 13 14 15 16 17 18 19 20 21 22 23 24 25 26 27 28 29 30 31 32 33 34 35 36 | |
The first member variables are storing our circular buffer’s capacity, fill count and two locations for reading/writing. Next, FFTSetup is holding the FFT weights array required by vDSP to perform the FFT transform. Concerning the buffers:
mChannels is an array containing various auto-pointers for each buffer we need : input/output data, split buffer to hold complex numbers that we’ll access using our specific pointer mDSPSplitComplex (we’ll explain that in a few seconds),
mWindowData holds floating-pont numbers of the window function we’ll choose to limit frequency leakage on our frequency spectrum (see part I),
mFFTSize holds the FFT size, and we propose 5 values : 1024, 2048, 4096, 8192 or 16384 samples.
By using auto-pointers as member variables (instead of simple pointers), we use the RAII (“resource acquisition is initialization”) technique of C++ to free our buffers when our Audio Unit is released (or, of course, if an exception occur). That is to say, destructors for CAAutoFree and CAAutoArrayDelete will be called automatically when our main class is released.
Here is the basic workflow of this class:
We first call Allocate() to initialize the circular buffer with a capacity of 16384 samples,
Each time our plugin render, we copy N frames to our circular buffer using CopyInputToRingBuffer(), then we call TryFFT() to compute those data,
In case the method TryFFT() returns successfully, we call GetMagnitudes() to obtain a floating-point array of magnitudes to display on a graph. We can get magnitudes for left/right channel separately (channelSelect is 1 or 2), or we can look at the average magnitudes of a stereo channel (channelSelect is 3).
Using a Ring Buffer
 Audio Units generally capture N input samples each time they are rendered, N being set by the host in which they operate. N has a value usually lower than the minimum number of frames required for computing FFT, so before we can provide at least 1024 samples to FFT, we have those N samples stored into a ring buffer over a few cycles.
This kind of buffer is circular: thus, it never overflows. We always keep K samples in the ring buffer, K being the buffer’s capacity. That’s why we maintain two int pointers :
mRingBufferPosRead indicates where we must read when we extract samples to compute FFT,
mRingBufferPosWrite is the same for writing into the ring buffer.
We use an “overlap-add” algorithm to fill our ring buffer, that is, we possibly split the N samples being added, on part being stored at the end of the buffer and the other being stored from the beginning index. You can look at the method CopyInputToRingBuffer to get an example of such algorithm.
We also use this technique to extract N samples from the ring buffer (look at the protected method ExtractRingBufferToFFTInput() method). However, we ensure that enough samples have been stored into the buffer before we call this method.
You may note that our implement isn’t thread-safe, hence all calls to the SimpleSpectrunProcessor’s methods must be called from the same thread.
Data packing for vDSP FFT
The library vDSP.h provides two structures for packing the N samples you pass to the FFT: DSPComplex and DSPSplitComplex. You should first read the neat article made by Apple on data packing. Here is a summary:
Your N samples are first stored into a 16-bits aligned float-point array, called our input buffer,
Whereas a real FFT would produce 2N complex numbers, the vDSP FFT truncates the result to store N/2 complex numbers in our output buffer: hence the input/output buffers have the same N size,
Prior to the FFT function, you need to reorganize your input buffer by copying your N samples into a split buffer.
This split buffer is first initialized as a 16-bits aligned floating-point array, as you may read in the protected method InitFFT(). It is next accessed using a DSPSplitComplex structure that “groups” floating-point together, for this buffer to behave as an array of N/2 complex numbers (with both real and imaginary parts).
This is important to remember that the last mandatory step before we can compute FFT is to reorganize you split buffer by calling vDSP_ctoz: this will “pack” floating-point numbers for the vDSP FFT by a stride of 2.
For instance, if your input buffer is [x1, x2, x3, x4, x5, x6, x7, x8], then your split buffer will be [x1, x5, x2, x6, x3, x7, x4, x8]. After FFT, you’ll get [c1.real, c1.imag, c2.real, c2.imag, c3.real, c3.imag, c4.real, c4.imag]. But, if the DSPSplitComplex structure can see interleaved complex numbers like previously, our split buffer remains an aligned buffer with [c1.real, c2.real, c3.real, c1.imag, c2.imag, c3.imag, c4.imag].
The power of SIMD
 What is the plot of having all those buffers ? We could have reworked things to diminish memory footprint.
Instead, we’ll use the great SIMD features of the vDSP library with no proprietary code at all! The benefit here is to drastically reduce the computing time of a large number of samples. Furthermore, vDSP provide numerous mathematical functions that will help us achieve our sound analysis.
At first sight, there are a lot of functions. You’ll soon get use to the naming conventions used by Apple to find the good one: for instance, if you are looking to a vector-scalar operation, you may search for a function named vDSP_vs[something] or vDSP_sv[something]. It you are working with 64-bits IEEE floating point numbers, you will look at the functions named vDSP_[something]D (D for double).
Here is what our SimpleSpectrumAnalyzer will do:
First, we determine our current windowing function by simply calling one of the ready-to-use functions: vDSP_hann_window (Hann), vDSP_hamm_window (Hamming) or vDSP_blkman_window (Blackman)
We multiply our N samples with the window function using vDSP_vmul
As seen above, our DSPComplexSplit structure is organized by vDSP_ctoz
We compute FFT with vDSP_fft_zip (as a naming convention, “z” stands for complex numbers),
Magnitude of a complex number can be obtained with vDSP_zvabs (we could have possibly used vDSP_zvmags, see below)
We next normalize our magnitudes, by dividing then by two, using vDSP_vsdiv (since we got N/2 complex numbers which is half of the N input samples)
We convert magnitudes to a decibel value using vDSP_vdbconv
We correct each decibel values by applying a Db correction with vDSP_vadd
We could possible obtain an average value for left and right channels using vDSP_vadd and vDSP_vsdiv.
We’ll leave these steps unchanged to keep this tutorial simple, though we could have tweaked things a bit. As you know, the decibel formula is given by:

As an optimization, rather than multiplying/dividing U1 or U2, we could have left U1 unchanged, called vDSP_vdbconv, then take this into account when applying our dB correction. Indeed, every multiplication or division on U1 can translate into an addition or deletion on log10(U1). In the same manner, we could have used vDSP_zvmags instead of vDSP_zvabs and saved one sqrt operation.
Using SimpleSpectrumProcessor in our Audio Unit
We’ll wrap up this part by showing you how our SimpleSpectrumProcessor is used in the main code. Basically:
It’s a member variable of the main class SimpleSpectrum.h (hence all of our resources are released using the RAII technique),
We override the AUEffectBase::Render() method, responsible for grabbing N samples from the audio inputs and computing FFT,
You may notice that we aren’t using the class SimpleSpectrumKernel at all, even if we have overridden the method AUKernelBase::Process(), which is a required step for our Audio Unit to be validated by the auval tool.
Here the snippet of the main work:
1 2 3 4 5 6 7 8 9 | |
Conclusion
I let you examine the Apple documentation to get acquainted of the different methods you can override from the base classes AUEffectBase and AUBase. In an upcoming tutorial, we will make a better use of the AUKernelBase class, but in the meantime, we shall look how we’ll build a GUI to draw our spectrum data.